
Let the sunshine in
When I think back on the start of our journey in natural dyeing, I think of sunshine…the warm sunshine of an early September day, a sense of satisfaction in learning to do something new, and the golden sunshine hues that came from the very first experiment we did with marigold and goldenrod.
As it turns out, marigolds and goldenrod not only produce vibrant yellow shades that convey joy -- they are both freely available to us from my garden and large pasture. And what is better than freely available dyestuff?!
Marigolds can be harvested throughout the growing season (picking off or “dead-heading” the blooms just after they are at their peak and start to slightly wilt) and can be used fresh or dried. Goldenrod is harvested when it is just starting to bloom and should be used right away or frozen for use later.
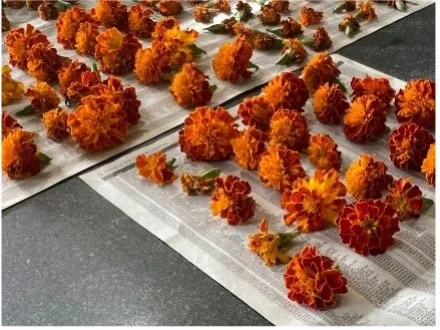
For this first experiment we used marigolds that had been dead-headed about 3 weeks prior and dried on a sheet of newspaper. If you pick marigolds throughout the season, you can string them on a strong thread and hang them as a garland to dry. Since there is quite a bit of moisture in the marigold head, if you are not hanging them to dry you want to be sure to spread them out to dry so they don’t get moldy (lesson #1!). We used goldenrod that had been harvested the same day. To harvest goldenrod, just cut directly below the main flower head; it’s fine if some leaves get in but try to avoid including a lot of large pieces of stem because that can influence the weight of the dyestuff. And remember to save some blooms for the bees! Goldenrod is an important source of late season nectar and pollen for them.
For both dyebaths, we just simmered the flowers for about an hour, then strained the dye liquid and added our wetted wool skeins that had been pre-mordanted with alum. For both marigold and goldenrod, alum is needed to ensure the dye chemicals fix securely to the wool fibers. We simmered the skeins for about an hour, then hung them to dry. The next day we rinsed them until the water ran clear, and then washed with gentle soap

Maybe because this was our first natural dyeing experiment, maybe because it was so straightforward, maybe because the materials came from my own garden, or maybe because of the joyful yellows that resulted, dyeing with these two flowers continues to be one of my personal favorites. The goldenrod (on the left in the photo below) provides a wonderful clear yellow base that can be used on its own or color shifted to chartreuse or olive green, or it can be overdyed with indigo for a more vivid green. The marigold (on the right) is a warmer gold color, that goes wonderfully with madder or with walnut. We are planning more experiments with marigold petals to give a speckled golden effect, so stay tuned for that!

Most of all, as the results from our very first experiment show, don’t be afraid to find and experiment with these or other local dye plants that are available to you. You may not always get the result you were hoping for, but chances are you will learn something and find joy in creating with nature. There are lots of accessible resources for starting to learn about commonly used dye plants—two that we consulted early on are the website www.wildcolours.co.uk and the book “Wild Colour” by Jenny Dean.
Happy dyeing!
Linda